 |
Central Nexus |
|||||
|
Pendulum Seismograph ProjectHow It BeganThe first time I made a seismograph was in the summer of '88. It was just made of a pendulum. The pencil had a bit of weight on it, but not too much or else there would be so much friction that the pencil wouldn't move. It was attached vertically to the end of a string. Unfortunately the pencil would lift off the paper during an earthquake, and it wouldn't leave much of a record. The curved pendulum movement made it hard to record movement on a flat surface. This pendulum proved to be impractical at the time. The second time I made a seismograph was August 9, 1989, which was just after a big earthquake near Morgan Hill, California. I was able to make it out of inexpensive stuff from the family desk and garage. I used about the same principle as the first seismograph, but instead of attaching the pencil directly to the pendulum, I attached wires to the end of two pendulums. Each pendulum had rubber band hinges, and the other end was attached to a pencil between the two. Instead of a pendulum attached at one end, I used a fulcrum in the middle of the wire pendulum. This configuration made it easier to transfer the lateral movement of each pendulum. Each of these pendulums were attached to the same pencil. Below is a picture of this first seismograph. 
My first practical seismograph.
The idea of this seismograph came from a TV show that was on about a few months earlier at the time, called "3-2-1 Contact." It was a drawing table that drew interesting patterns. This seismograph was a little different than what I saw because mine had two pendulums, and the fulcrum was in the middle. After I made this seismograph, I just needed to put a piece of paper under the pencil, and put it on a heavy piece of furniture. It stayed there waiting for the next earthquake. Little did I know that the next earthquake it would record was on October 17, 1989 near Loma Prieta. After I recorded a few of these earthquakes, I had to create a science fair project for my 7th grade science class at the time. I decided to just reuse what I had at the time for the school science fair. I eventually decided to create a new one that is a little more sensitive and taller. The pencil in the got a rubber band hinge to make it easier for it to move around. The pencil was also a lot softer so that it could make a darker line. The pencil was also the only thing I bought, and it cost $1. Everything else was found lying around the house. 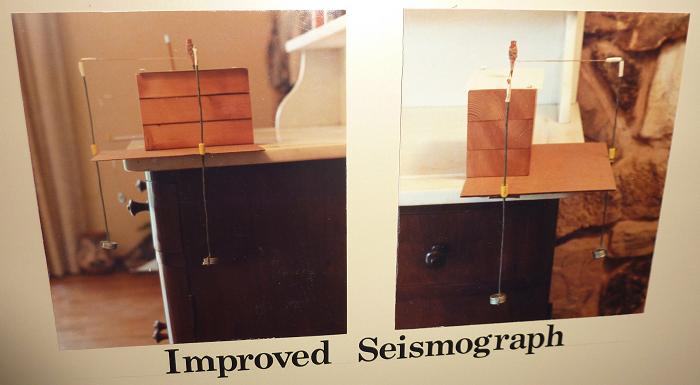
The second revision of the seismograph.
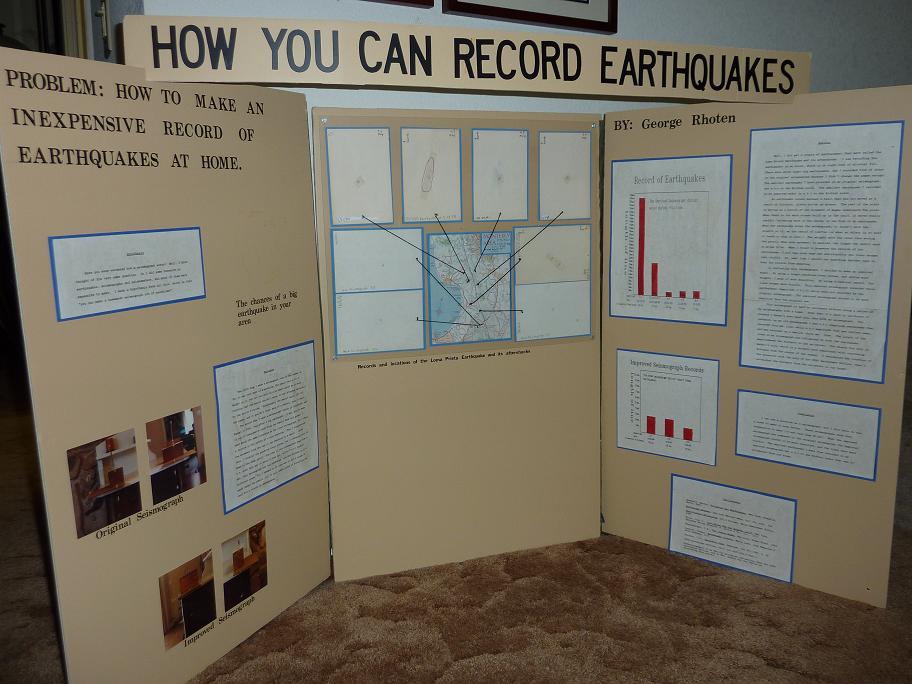
What's left of the science fair project board with its results.
I entered these two seismographs and their records into the Santa Clara county science fair. They won me 1st place, grand prize for the division and $150. As a kid, I thought that was a great return on investment. When I entered them into the California State Science Fair, I didn't win anything. It's a whole lot more competitive at the state level. Next StepsIf I were to create a new version of this pendulum based seismograph, I would probably go back to a traditional pendulum with a twist. The pendulum would be attached to the top of a box with the weight at the bottom as usual. Instead of attaching the pencil and wires to the top, I would attach them to the weights at the bottom of the pendulum. This would put all the weight to the bottom of the pendulum. This would prevent the inertia of the weights at both ends of the lever from working against each other. Of course, technology has improved and become a whole lot cheaper over the years. Now there are cheap accelerometers that you can attach to computers. This allows you to measure acceleration of movement in all 3 directions and to record the time of the event. You can do a lot more analysis of the movement on a computer anyway. My next seismograph is electronic, and it's recording in my garage waiting for the next earthquake. |
|||||
| Questions & Comments | ||||||